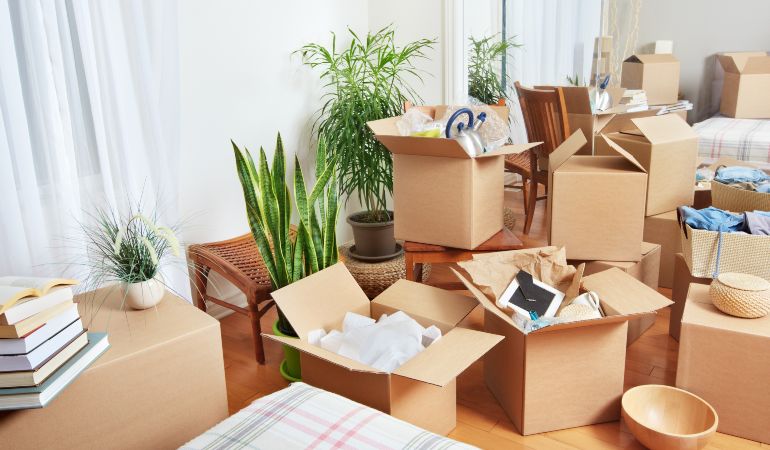
Moving house is hard enough with pets, but when you have to transport your beloved houseplants or garden plants, the process can become even more complex. Whether you’re moving plants in a pot, or from a garden, there are a few very important things to consider.
That is why, as part of our moving advice articles, we’ll share essential tips on how to move plants safely during your house relocation, ensuring they arrive at your new home healthy and thriving.
Table of Contents
Plan the moving of your plants
Understand your plants’ dormant periods
The best time to move plants is during their dormant period, typically between October and February for many species. The dormant period is the part of the plant cycle when they have died out. Moving during dormancy reduces the risk of shock and helps your plants adapt more easily to their new environment.
Check for soil and climate compatibility
If you are moving to a different climate zone, check whether your plants can make it through in the new soil and weather. Researching this beforehand can save you the disappointment of losing plants that aren’t suited to the new location. If a plant isn’t likely to survive in the new environment, it may be better to leave it behind.
Plan for large plants and garden relocations
If you have a few pots, you just have to find them a place in the van. But, if you’re moving large plants or the entire garden, you need serious organisation. This might require visiting your new home in advance to map out the planting areas. Large garden moves may also require professional help to ensure everything is done correctly.
You may also like: Green Thumb’s Guide: How to Pack Plants for a Safe Move
Pack your house plants
1. Prepare your plants for relocation
Three to four weeks prior to your move, transfer your houseplants into shatterproof containers. This advanced re-potting allows your plants to acclimate to their new pots, minimizing the stress they experience during the moving process.
2. Trim your houseplants
About a week after repotting, consider trimming your houseplants if necessary. Reducing their size will facilitate packing and decrease the likelihood of leaf drop during transit.
3. Wrap the pot with bubble wrap
When it’s time to pack your houseplants, start by wrapping the pot in bubble wrap. You may also place the pot inside a plastic bag to prevent soil spillage. Be sure to only wrap the pot, leaving the plant exposed.
4. Place your plant in a cardboard box
Begin by securing the bottom of the box with tape to ensure it is stable. Then, carefully position your plant (or several plants if the box permits) inside the box.
5. Include protective materials
Once your plant is in the cardboard box, fill any empty spaces with protective materials such as old newspapers, sturdy paper, or packing peanuts. Ensure that your plants are well-secured to prevent them from tipping over or falling out during the move.
6. Seal, label, and create ventilation holes
Use strong packing tape to seal your box, then make a few holes in the top and sides with scissors to allow air and light to reach your plants. Clearly label the box with the intended room for the plant in your new home. If you have multiple plants, consider adding a brief description for easy identification, such as “succulents for bathroom” or “cheese plant for kitchen.”
If you are relocating in cold weather, consider acquiring a substantial amount of horticultural fleece. Gently wrap your plants in this material prior to placing them in boxes. Temperatures dropping below approximately 5 degrees can harm your plants, so it is essential to reduce their exposure to harsh outdoor conditions.
Transportation
During transportation, temperature and light conditions can affect your plants. Therefore, avoid exposing your plants to extreme temperatures. Keep the moving vehicle at a moderate temperature and avoid placing plants in the trunk where it can get too hot or cold.
If the journey is long, try to position the plants where they can get some natural light, but avoid direct sunlight, which can scorch the leaves.
Unpack your plants
While unpacking can be a tedious task, it is essential to prioritise your plants as soon as you arrive at your new home. Ensure that they are unpacked promptly, as they do not thrive in darkness. However, don’t rush to place them in their final location immediately.
Create a serene environment
It is important to provide a calm and stable environment for your plants. They require neutral space to acclimate comfortably. Arrange them together in an area with moderate light – avoiding direct sunlight while ensuring it is not overly shaded. Instead of watering them right away, give them a light misting. When you do water them, do so gently, avoiding excessive soaking. Keep them in this designated spot for a minimum of 3-4 days.
Don’t feed them immediately
As your plants adapt to their new environment, it is essential to minimise any potential stress. This entails postponing feeding, pruning, or repotting for a minimum of two weeks.
Engaging in these activities could stimulate growth in your plants, which is undesirable during their adjustment period. Give them the time they need to acclimate to their new surroundings. Soon enough, both you and your plants will feel at ease in your new setting.
How to move house plants long-distance
When the designated moving day is here, and especially if your trip is going to be a long one, such as moving to Germany from the UK, you would have to prepare your plants well. Here is how to move houseplants across the country or even further.
- Place plants in pots. If there will be a whole garden to move, you better arm yourself with all the pots you need and a spare at least a day on putting everything in comfortable pots, easy to be picked up and loaded.
- Label all pots. Put a label on each with information about soil preference and where it would go in the new garden. This will make unloading and organising at the new garden a lot easier.
- Designate a place in the van for each pot. Some plants need sunlight more than others and it’s a good idea for you to know where to put each in order to make their trip comfortable.
- Keep pots in a dry place for a week. A week before the moving day, your plants need to breathe some dry air. Plants usually make the indoor air moist, and it’s not a good idea to leave packed cardboard boxes near them.
- Spray the plants with water. On moving day it’s better to spray them instead of watering. This is only done in a dry climate. See below what to do in heat and frost.
- Put the plants in a newspaper for protection. Once your plant is securely placed in the cardboard moving box, surround it with protective materials – you can use old newspapers or sturdy paper. It’s crucial to secure the plants properly to prevent them from tipping over or falling out of the box.
Book Fantastic Removals for an easy move!
Enter your postcode to view our rates and availability in your area.
For questions about the services we offer visit our main site or you can always call us at 020 3746 0584
How to move house with plants in hot weather
If you happen to move in the hottest months and can’t afford to wait, you should know that your plants might suffer badly. Especially, if you take them out of a cooled house and into scorching heat. To make the temperature bearable for your plants during the removals, here’s what you can do.
- Keep plants shaded. Place your plants in a shaded area of the moving van to prevent exposure to direct sunlight, which can scorch leaves and stress the plants. A few hours of darkness won’t harm them, but excessive heat can be deadly.
- Hydrate regularly.. If possible, stop every couple of hours to lightly water your plants. This keeps them hydrated and cool during the journey.
- Add a layer of mulch. Mulching not only provides nutrients to your plants but also retains moisture for an extended period which helps keep the plants cooler.
- Place water granules in the pots. If you’re not able to stop and water your plants, you can use water granules. They release moisture slowly over time, providing a consistent source of hydration.
How to move house with plants in cold weather
Moving house with plants during cold weather presents another extreme that your plants need protection from. Learn here what you can do to safeguard them from frostbite and other adverse effects.
- Place the plants near the windows. If the moving van has windows, place plants near them to take advantage of any sunlight, which can help keep them warm.
- Insulate with mulch . Mulch not only keeps moisture for a longer period but also acts as an insulator, holding in heat in the soil.
- Cover your plants. Throw a blanket, drop cloth, or tarp over your plants. Make sure it’s not nylon or plastic sheets, as those also keep the oxygen out and your plant might suffocate. Ensure the covering doesn’t touch the leaves to avoid frost damage.
- Water your plants. Soil can trap heat inside, and it does it way better when wet. However, avoid watering if the soil is frozen, as this can cause damage.
- Use a heater. If possible, use a portable heater in the vehicle’s compartment during transportation of the plants. However, be cautious and monitor the heater to prevent overheating.
Conclusion
Moving house with plants requires careful planning and consideration. But by following these tips on how to move plants safely, you can ensure your green companions make it through the relocation unscathed. Whether you’re moving across town or to another country, proper preparation is key to keeping your plants healthy and helping them thrive in their new home.


